
Introduction
I still remember the first time I made Lemon Chicken Romano—because I accidentally zested my thumb. Oops. I was trying to be fancy, you know, that quick flick of the wrist you see on cooking shows? To be real, my kitchen looked like a micro-snowstorm of Romano cheese and lemon zest, the kind that sticks to your socks and follows you around for the rest of the day. But the smell—oh my goodness—the smell made the chaos worth it. Golden cheese sizzling in the pan, bright lemon mist wafting up like sunshine, and a little garlic perfume sneaking into every corner of the house. It felt like a hug disguised as dinner, the kind of healthy comfort food that makes you forget the mountain of dishes in the sink.
There’s a Sunday memory attached to this recipe for me. We were a little overdue for a family night—everyone tired, everyone hungry, zero patience. I had chicken breasts thawed and a block of Romano waiting, which is basically the universe whispering, “Do it.” I dredged, I dipped, I pressed on that cheese crust, and listened for the first crackle in the pan. If you’ve ever needed proof that you can make easy weeknight dinners feel special without five pots and a culinary degree, this is it. The edges go crisp, the center stays juicy, and the lemon sauce—zingy and buttery—makes everything on the plate sing. Honestly, I didn’t expect it to taste like a restaurant meal I could afford on a Tuesday. But here we are.
What I love most? This is the rare dish that charms picky eaters and the “I just started a protein meal plan” crowd at the same time. It nails that magic balance: satisfying, bright, and yes—high-protein enough to slide into your list of high protein meals or even low calorie chicken meal prep if you portion it with greens. It’s also wildly budget-friendly recipes territory because the ingredient list is pantry-simple and the dinner payoff is big. You can plate it with roasted veggies for quick family meals, tuck it into meal-prep containers with orzo or brown rice (hello, high carb high protein low fat meals), or slice it up for a leafy lunch that microwaves like a dream—looking at you, meal prep microwave lunches fans.
So if your week has been a little loud and you want that quiet moment where dinner just works, this Lemon Chicken Romano is your answer. It’s bright. It’s crispy. It’s cozy with a lemony wink. And yes, it’s the perfect excuse to put your phone down, light a candle, and eat something that tastes like you’ve taken excellent care of yourself—without losing your whole evening to the stove.
Why You’ll Love This Recipe
- Crispy outside, juicy inside: The Romano crust turns gorgeously golden while the chicken stays tender. It’s the “how is this so good?” effect.
- Big flavor, small effort: Pantry ingredients, minimal steps, maximum payoff—ideal for easy weeknight dinners and quick family meals.
- Meal-prep friendly: Slices beautifully for bowls, wraps, or salads—great for best meal prep healthy goals and high macro meals.
- Bright and cozy at once: Zesty lemon delivers lift; the cheesy crust gives comfort. Feels like a hug with a lemon wedge.
- Picky-eater approved: Familiar flavors, no weird textures, and an “I want seconds” sauce moment.
- Versatile for your goals: Build it into low calorie high nutrition meals with greens, or pair it with pasta for high protein high carb low fat meals.
What Makes This Recipe Special?
Lemon Chicken Romano is fried just enough to crisp the cheese—no heavy breading, no deep fryer, and no fuss. The crust isn’t breadcrumbs; it’s grated Romano that melts and crackles against the hot pan, creating that irresistible lacy edge. Then there’s the pan sauce: garlic blooming in the leftover drippings, lemon juice and zest swirled in, and just enough butteriness (from the olive oil and Romano) to feel luxe. It’s a little Italian-American bistro vibe meets weeknight practicality. I also love that it’s easy to scale—you can make a generous batch for good meal prep plans, tuck portions into containers, and you’ve got best meals to prep for days.
Ingredients
- Boneless, skinless chicken breasts (about 1½ pounds/4 small breasts): Thinly sliced or lightly pounded to an even thickness so they cook evenly and quickly. Even thickness is your best friend when you want a crisp crust without overcooking.
- Kosher salt and freshly ground black pepper: Because flavor. Season the chicken directly, then season your flour as well for a double hit.
- All-purpose flour (about 1 cup): A whisper-thin flour coat helps the eggs stick and keeps the cheese from falling off in the pan.
- Large eggs (2): Beat with a splash of water to create a light “glue” that welcomes a generous coat of Romano.
- Finely grated Romano cheese (1 cup packed): Freshly grated is non-negotiable for that signature crispy edge. Pre-shredded won’t melt the same way.
- Extra-virgin olive oil (¼ cup, divided): A flavorful cooking fat that helps the crust brown and turn lacy without feeling heavy.
- Garlic (3 cloves, minced): Fragrant and punchy; it makes the sauce smell like a trattoria kitchen on payday.
- Fresh lemon (zest and juice of 2): The bright, fresh acidity transforms the salty-savory cheese into something lively and craveable.
- Optional add-ins: Rinsed capers, chopped fresh parsley, or a pinch of crushed red pepper for heat.
Ingredient notes & tips (and a few “don’ts”):
- Don’t skip pounding or slicing the chicken thinly. Thick pieces burn before they cook through.
- Don’t use pre-grated “sandy” Romano in a green can—great for sprinkling, not great for crusting.
- Do zest the lemons before juicing (ask my thumb). It’s way easier.
- Do season each station lightly—flour and eggs both—so the crust tastes properly seasoned.
- If you’re chasing healthy eating for two or portion-focused protein eating plan goals, weigh your chicken pieces before cooking to track macros more easily.
- Brand love: I reach for Pecorino Romano wedges from my grocery’s specialty case; they grate into fluffy piles that crisp perfectly. For olive oil, a mid-range extra-virgin with a peppery finish is wonderful here.
How to Make It Step-by-Step
- Prep and season. Pat the chicken dry (this matters). If the breasts are thick, slice them horizontally or pound to about ½-inch. Season both sides with salt and pepper. I like to set them on a wire rack while I build my dredging line—keeps the undersides from getting soggy.
- Set up the stations. Three shallow bowls: one with the flour (lightly seasoned), one with the beaten eggs + a tablespoon of water, and one with a fluffy mound of finely grated Romano. I know the cheese looks like too much. Trust the process.
- Dredge with intention. Dip a chicken piece into the flour and shake off the extra—like, really shake it. Then the egg, letting the excess drip back into the bowl. Finally, press both sides into the Romano, coaxing the cheese to cling in an even coat. If some spots look bare, sprinkle a little more on and press again.
- Heat the pan. Add a thin layer of olive oil to a large skillet (stainless steel or cast iron both work). Heat over medium to medium-high until shimmering. You want that “quiet sizzle” when the chicken hits—not a smoke alarm moment.
- Sear the first side. Carefully lay in the chicken, leaving space so steam can escape. You should hear gentle crackling and see edges beginning to turn golden after 2–3 minutes. Don’t scoot it around. Let the crust set. If it smells like the cheese is browning too fast, nudge the heat down.
- Flip with confidence. Use a thin spatula to get under the cheese crust and flip. This is where I had my “oops” the first time—hesitated and broke the crust in half. Commit to the flip and you’ll keep that beautiful lacy edge. Cook the second side 3–4 minutes more. Internal temp should hit 165°F.
- Rest on paper towels. Transfer to a plate lined with paper towels or a rack and repeat with remaining pieces, adding a splash more oil as needed. The crust will crisp further as it rests, which is extremely satisfying to watch.
- Build the sauce. Pour off excess oil, leaving about 1 tablespoon plus the flavorful browned bits. Add minced garlic and stir for 20–30 seconds until fragrant (don’t burn it!). Stir in lemon zest and juice, scraping up the fond. Let it bubble for 30–60 seconds to mellow the tartness. If you love a silkier sauce, whisk in a tablespoon of water or a tiny pat of butter (optional).
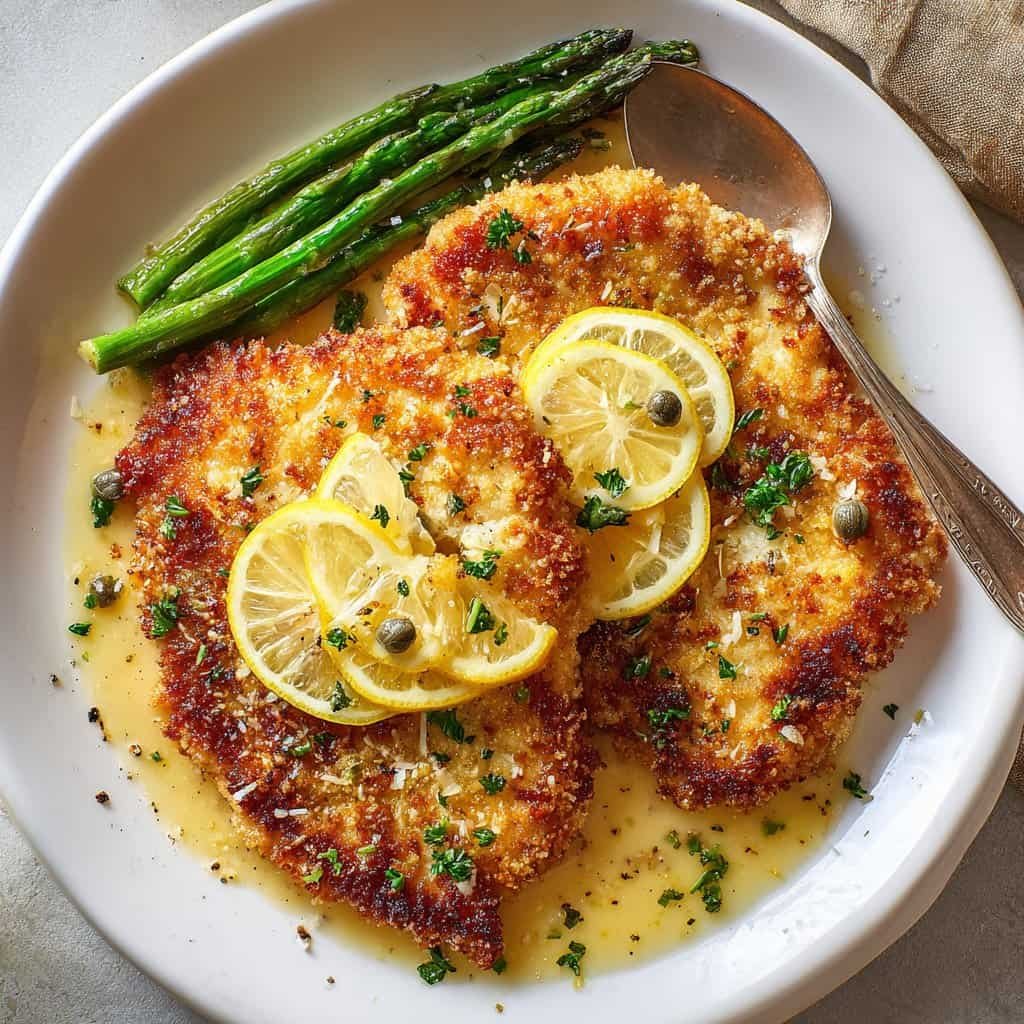
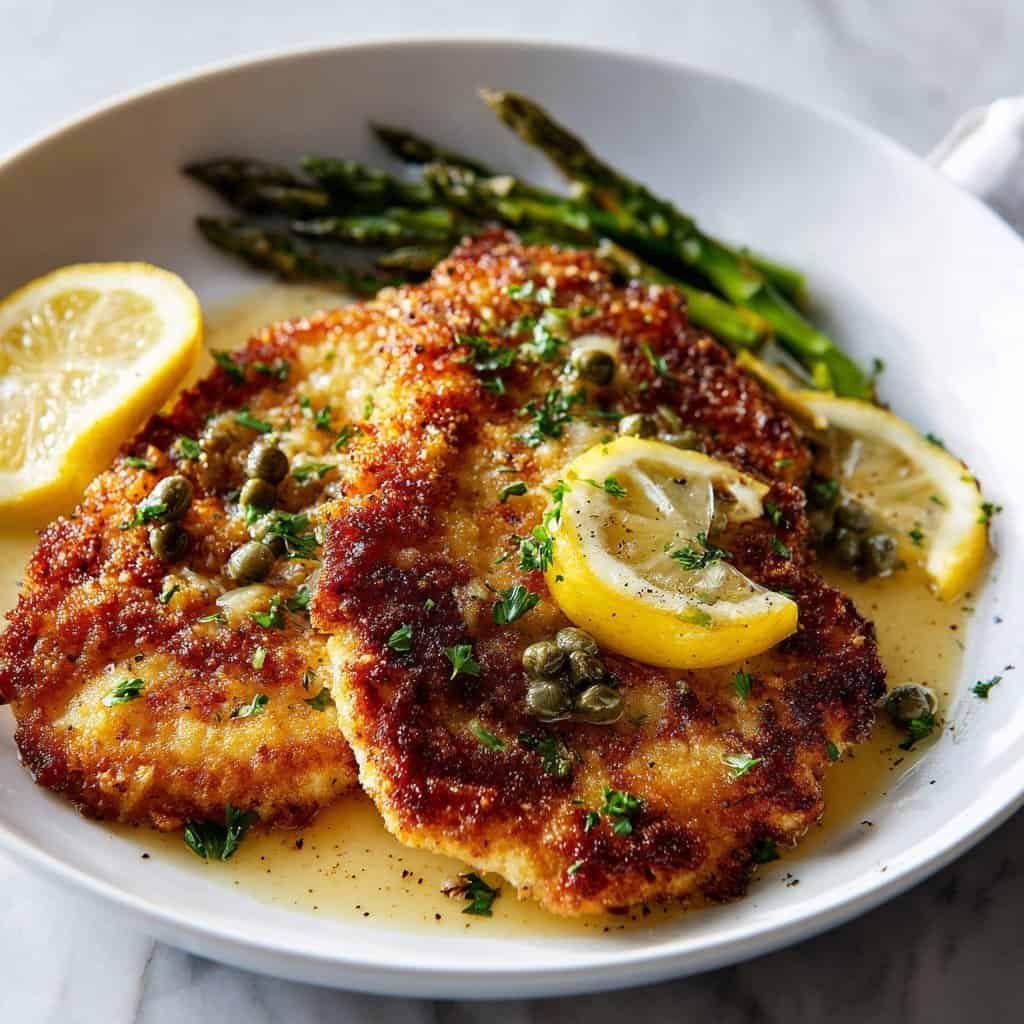
- Finish and serve. Return the chicken to the pan, spoon the lemon-garlic gloss over each piece, and shower with chopped parsley if you’re feeling fancy. That first bite should crunch, then give way to juicy chicken and bright lemon. It’s the sound of a very good decision.
Sights, smells, textures to expect: Cheese edges turning blistered and golden, little pops from the pan as moisture escapes, steam carrying lemon-garlic perfume across your kitchen. When you slice in, there’s a gentle resistance from the crust and a clear, juicy center—no dryness, no sawdust vibes. Honestly, that first slice is a chef’s-kiss moment.
Encouragement to improvise: Add capers to the sauce for briny sparkle, toss in spinach to wilt at the end, or swirl in a tablespoon of Greek yogurt off heat for creamy tang. Feeling pasta? Reserve a half cup of pasta water and toss cooked spaghetti straight in the pan with the sauce, then crown with sliced chicken. That turns this into a weeknight hero on the level of the best dinner prep meals playlist.
Tips for Best Results
- Grate fine. A microplane or the small holes on a box grater gives Romano a fluffy texture that melts and crisps evenly.
- Heat control is everything. Too hot and the cheese scorches before the chicken cooks; too low and you’ll steam. Adjust in tiny nudges.
- Season in layers. A little salt in the flour and egg adds depth so the crust doesn’t taste flat.
- Work in batches. Overcrowding traps steam. Give your chicken breathing room for crisp edges.
- Rest before saucing. Two to three minutes on paper towels keeps the crust snappy, then spoon over sauce so it stays crisp.
- Slice on the bias for meal prep. It looks great and cools faster for containers—perfect for premade lunch meals and best meal prep plans.
Ingredient Substitutions & Variations
- Cheese swap: Parmesan works beautifully and brings a slightly nuttier flavor.
- Protein pivot: Try thin pork cutlets or firm tofu slabs (pat very dry). Shrimp also love this lemon-garlic pan sauce—quick, lively, and great for no prep healthy lunches.
- Gluten-free: Use a 1:1 gluten-free flour blend. The cheese crust still crisps like a dream.
- Add-ins: Capers, sun-dried tomatoes, or a pinch of chili flakes turn this into date-night energy on a weekday.
- Herb twist: Basil for summer, thyme in cooler months. Parsley is classic and bright.
- Macro-friendly builds: Over quinoa with roasted broccoli for high protein high carb low fat meals, or with zucchini ribbons for no prep keto meals and a keto meal plan vibe.
Serving Suggestions
This chicken shines with simple sides that let the lemon talk. I love roasted asparagus, a garlicky green salad, or buttery orzo. For healthy boxed meals energy at home, add steamed green beans and a lemon wedge. Craving cozy? A small bowl of olive-oil mashed potatoes turns this into peak healthy comfort food. And if you meal-prep for the week, pack with brown rice and roasted peppers for best high protein ready meals flavor without the freezer aisle.
Pairing Ideas (Drinks, Sides, etc.)
- Drinks: Sparkling water with lemon slices, iced tea with honey, or a crisp nonalcoholic spritz with citrus peel.
- Starches: Lemon orzo, buttered spaghetti, roasted baby potatoes, or fluffy couscous.
- Veggies: Charred broccolini, blistered cherry tomatoes, or a simple arugula salad with shaved Parmesan.
- Something fresh: Cucumber ribbons with dill and a squeeze of lemon to echo the sauce.
How to Store and Reheat Leftovers
Cool completely, then store in airtight containers up to 3 days. To keep the crust crisp, reheat in a skillet over medium heat with a tiny splash of olive oil, flipping once, until warmed through. The air fryer also works like a charm for 3–5 minutes. The microwave is convenient (I get it), but reheat in short bursts and finish with a quick skillet kiss so the edges perk up again. Pack lemon wedges separately so you can brighten leftovers on the spot—great for low calorie premade meal delivery vibes at home.
Make-Ahead and Freezer Tips
- Make-ahead: Dredge and cheese-coat the chicken, then place on a parchment-lined tray. Refrigerate up to 6 hours. Bring to room temp for 15 minutes before cooking.
- Freeze (cooked): Cool completely, wrap each piece tightly, and freeze up to 2 months. Reheat from frozen in the oven or air fryer until hot and crisp. Add fresh lemon juice after reheating to wake everything up.
- Freeze (uncooked): I prefer freezing after cooking for better crust texture, but you can freeze dredged, uncooked pieces between parchment. Let thaw in the fridge, then pan-fry.
Common Mistakes to Avoid
- Cheese too coarse: Large shreds melt unevenly and fall off. Go fine.
- Pan too crowded: Steam ruins crisp edges. Work in batches.
- Skipping the dry-pat: Surface moisture = soggy crust. Paper towels are your friend.
- Sauce on full blast: Lemon scorches easily. Gentle simmer, then off heat.
- Overcooking: Thin cutlets cook fast. Pull them the second they hit 165°F in the center.
Frequently Asked Questions (FAQ)
Can I bake instead of pan-fry?
You can, though the crust is crispiest in a skillet. Bake at 425°F on a lightly oiled rack until 165°F, then briefly broil to brown. Drizzle the lemon-garlic sauce after.
What’s the best way to get the cheese to stick?
Dry chicken, light flour, well-beaten eggs, and finely grated Romano. Press the cheese on firmly and let the first side sear undisturbed so it sets.
Is Parmesan a good substitute?
Absolutely—Parmesan brings a nutty, slightly sweeter flavor and crisps well when grated fine.
How can I make this part of low calorie chicken meal prep?
Use 4-ounce cutlets, pair with roasted veggies or salad, and portion the lemon sauce. It fits neatly into protein eating plan or meal planning chicken routines.
Can I add capers or sun-dried tomatoes?
Yes, stir in a tablespoon or two after the garlic for a briny or sweet-tangy boost that loves lemon.
Cooking Tools You’ll Need
- Large skillet (stainless steel or cast iron)
- Cutting board and sharp knife
- Meat mallet or rolling pin (for even thickness)
- Three shallow bowls (flour, egg, cheese)
- Microplane or fine grater (for Romano and lemon zest)
- Tongs and a thin spatula (for confident flipping)
- Instant-read thermometer (to banish dry chicken forever)
- Paper towels and a wire rack (for crispy rest time)
- Citrus juicer (your wrists will thank you)
Final Thoughts
Every time I make Lemon Chicken Romano, I’m reminded that small moves—like a good zest, a confident flip, and a squeeze of fresh lemon—can turn a regular night into a memory. I’ve served it on fancy plates and straight off a sheet pan, and either way, it delivers that sparkle I crave at the end of a long day. There’s comfort in the ritual: the sizzle, the lemony steam, the way everyone quiets down at the first bite. It feels like the best kind of care—simple, bright, and totally doable, even when life is not.
If you’ve been searching for a dinner that straddles cozy and fresh, this is it. Build it into your best meal prep healthy rotation, slice it for salads like the best high protein frozen meals you wish existed fresh, or plate it with pasta when you need a little indulgent lift. And if your first flip breaks a crust? Same. It’ll still taste fantastic. Honestly, that imperfect crunch is part of the charm.
If you enjoyed this recipe, don’t forget to save it on Pinterest or share it with a friend!
Ingredients (Quick Reference & Measurements)
- 4 boneless, skinless chicken breasts (about 1.5 lbs)
- 1 cup all-purpose flour
- 2 large eggs, beaten with 1 tbsp water
- 1 cup freshly grated Romano cheese
- 3 cloves garlic, minced
- ¼ cup extra-virgin olive oil, plus more as needed
- Zest and juice of 2 lemons
- Kosher salt and freshly ground black pepper, to taste
- Optional: 1–2 tbsp capers, chopped parsley, pinch of red pepper flakes
Step-by-Step (Concise Card)
- Pound or slice chicken to even thickness; season with salt and pepper.
- Dredge in seasoned flour, dip in egg, press into finely grated Romano.
- Pan-sear in olive oil over medium/medium-high until crisp and 165°F; rest.
- Sauté garlic in pan drippings; add lemon zest and juice; simmer briefly.
- Spoon sauce over chicken; garnish with parsley; serve immediately.
Nutrition & Meal-Prep Notes
A typical 6-ounce serving lands around 35g protein with a moderate amount of fat from the olive oil and cheese—very friendly for high protein pre made meals style planning at home. Pair with greens and a starch of choice to hit your high protein high carb low fat meals targets, or keep it lean with extra veggies to slip into vegan low calorie meal plan–adjacent sides (think lemon-garlic green beans). For date night, think cozy bowls and a rom-com—yes, dinner and a movie still counts as self-care.
Happy cooking—and may your zest stay far from your thumbs.

Lemon Chicken Romano
Ingredients
- 4 boneless, skinless chicken breasts (about 1.5 lbs), sliced or pounded to 1/2-inch
- 1 cup all-purpose flour
- 2 large eggs, beaten with 1 tablespoon water
- 1 cup finely grated Romano cheese (freshly grated, packed)
- 3 cloves garlic, minced
- 1/4 cup extra-virgin olive oil, plus more as needed
- 2 lemons, zested and juiced
- kosher salt and freshly ground black pepper, to taste
- 2 tbsp capers, rinsed (optional)
- 2 tbsp chopped fresh parsley (optional)
- 1 pinch crushed red pepper flakes (optional)
Instructions
- Pat chicken dry. If thick, slice horizontally or pound to about 1/2-inch for even cooking. Season both sides generously with kosher salt and black pepper.
- Set up three shallow bowls: (1) flour seasoned lightly with salt and pepper; (2) beaten eggs with 1 tablespoon water; (3) finely grated Romano cheese.
- Dredge each chicken piece in flour, shaking off excess; dip in egg, letting excess drip; then press firmly into Romano to coat both sides evenly.
- Heat a large skillet over medium to medium-high heat with a thin layer of olive oil until shimmering. Add chicken without crowding; cook 3–4 minutes per side until deep golden, crisp, and internal temperature reaches 165°F.
- Transfer cooked chicken to a paper towel–lined plate or wire rack to rest. Repeat with remaining pieces, adding more oil as needed.
- Pour off excess oil, leaving about 1 tablespoon in the skillet along with browned bits. Add minced garlic; cook 20–30 seconds until fragrant (do not brown). Stir in lemon zest and juice, scraping up fond. Simmer 30–60 seconds to mellow.
- Optional: Stir in capers and a pinch of red pepper flakes. Return chicken to the pan briefly and spoon sauce over the top.
- Serve immediately, garnished with chopped parsley. Pair with salad, roasted vegetables, potatoes, pasta, or orzo. Spoon extra lemon sauce over each portion.


